Updated July 12, 2026 · 11 min read
The short answer
A well-designed walk-in shower balances four decisions: curb vs. curbless entry, frameless vs. half-wall glass, a bench or niche sized to NKBA's clearance guidelines, and tile with a wet-area DCOF of 0.42 or higher per ANSI A137.1. The strongest designs settle drainage and waterproofing first, then let glass and tile follow — not the other way around.
Key takeaways
- NKBA's Bath Planning Guidelines recommend a minimum 36"x36" interior for a one-person walk-in shower, with 30" of clear floor space at the entry — the starting dimension for every layout decision below.
- A curbless shower reads as more open and is easier to age into, but it demands a correctly sloped subfloor and a documented waterproofing assembly at the transition — it is a structural decision as much as a design one.
- Frameless glass (typically 3/8"–1/2" thick per National Glass Association guidance) reads lighter and shows less hardware, but has real height and width limits before it needs a support mullion; half-wall glass avoids a door entirely and suits curbless layouts well.
- ANSI A137.1 sets 0.42 as the minimum wet dynamic coefficient of friction (DCOF) for tile in level interior wet areas — a number worth asking for by name when choosing shower floor tile, since not every tile that looks good is rated for a wet floor.
- A built-in bench and a recessed niche are the two features homeowners request most and regret sizing wrong most often — both have real clearance minimums, not just aesthetic ones.
- If a household needs true accessibility, U.S. Access Board dimensions (36"x48" transfer, 30"x60" roll-in) are a different, stricter design target than a standard walk-in — worth deciding on up front, not retrofitting later.
Start with the layout, not the finishes
It is tempting to start a walk-in shower project by picking tile and glass, but the layout decisions — how big, curb or curbless, where the drain sits — constrain everything that comes after. NKBA's Bath Planning Guidelines recommend a minimum 36"x36" interior for a comfortable one-person shower and 30" of clear floor space at the entry. Those numbers are planning recommendations, not a legal minimum, but they are the baseline a walk-in shower should hit before anything else gets decided.
If the household includes anyone planning to age in place, or simply wants the option preserved, it is worth deciding that now rather than after tile is set — see the accessibility section below for the different clearance targets that applies.
Curb vs. curbless entry
A curbed shower has a raised threshold — typically 2"–9" — that contains water inside the pan with a mechanically simple, well-understood waterproofing detail. It costs less to build correctly and is the more forgiving option on an uneven or non-level subfloor.
A curbless shower removes that threshold, so the shower floor and the room floor read as one continuous plane. That openness is the appeal, but it comes with real requirements: the subfloor needs to be sloped correctly to the drain across a wider area (often the whole wet zone, not just the shower footprint), and the waterproofing membrane has to extend past the shower boundary into the transition zone. Done right, a curbless entry is also one of the most durable long-term accessibility choices in a bathroom — no step to navigate, ever, for anyone. Done without the correct slope and membrane detail, it is the single most common source of shower leaks. We cover the waterproofing assembly itself — membrane types, the pre-slope, and where installers most often cut corners — in our shower waterproofing guide.
Cost is the other major differentiator, since curbless construction typically involves more subfloor work and a wider waterproofed field. For real installed numbers by shower type and size, see our walk-in shower cost guide for Camas rather than relying on the rough ranges quoted elsewhere.
Glass: frameless, half-wall, or framed
Frameless glass has become the default look for a reason — no metal frame breaking up the tile, minimal hardware, and a heavier, more substantial feel underfoot when you close the door. The National Glass Association's frameless shower enclosure design guidance notes that the large majority of frameless enclosures use 3/8" or 1/2" glass, with height and width limits that scale with thickness — Glass Magazine reports 3/8" glass tops out around 84" tall unsupported, and 1/2" glass around 120", beyond which a support mullion or a design professional's sign-off is recommended. That matters most in a tall, wide walk-in enclosure — it is worth confirming glass thickness against the actual panel dimensions before assuming a single sheet of glass will span the opening.
A half-wall (also called a knee-wall or pony-wall) skips the door and hinge hardware altogether: a partial tiled wall, topped with a glass panel, that blocks direct spray without enclosing the shower. It pairs naturally with a curbless pan, since there is no door sweep to worry about at a zero-threshold entry, and it is usually the lowest-maintenance option — no door track, no hinges, less glass to squeegee. The tradeoff is less containment for anyone who showers more aggressively or has small kids who like to experiment with the showerhead angle.
A framed enclosure — aluminum framing around each glass panel — costs the least and is the most forgiving to install on an out-of-square opening, since the frame hides minor gaps a frameless installation would expose. It reads as more dated in a design-forward remodel, which is the main reason it has fallen out of favor, but it remains a reasonable choice on a tighter budget.
Benches: built-in vs. freestanding
A built-in bench — either a full bench spanning one wall or a corner seat — is one of the two most-requested walk-in shower features, and one of the easiest to get wrong on paper. A comfortable seat height runs 17"–19" from the shower floor, with at least 15" of depth to actually sit rather than perch. The bench itself needs to be built and waterproofed as part of the shower assembly, not added after tile is set, since it changes the water paths inside the wall and floor system.
A fold-down or teak freestanding bench solves the same problem without committing floor area permanently — useful in a shower with a tighter footprint, or where a future roll-in conversion is a possibility worth preserving. It is a lower-cost option but doesn't carry the built-in, finished look of a tiled bench.
Niches: where they go and how big
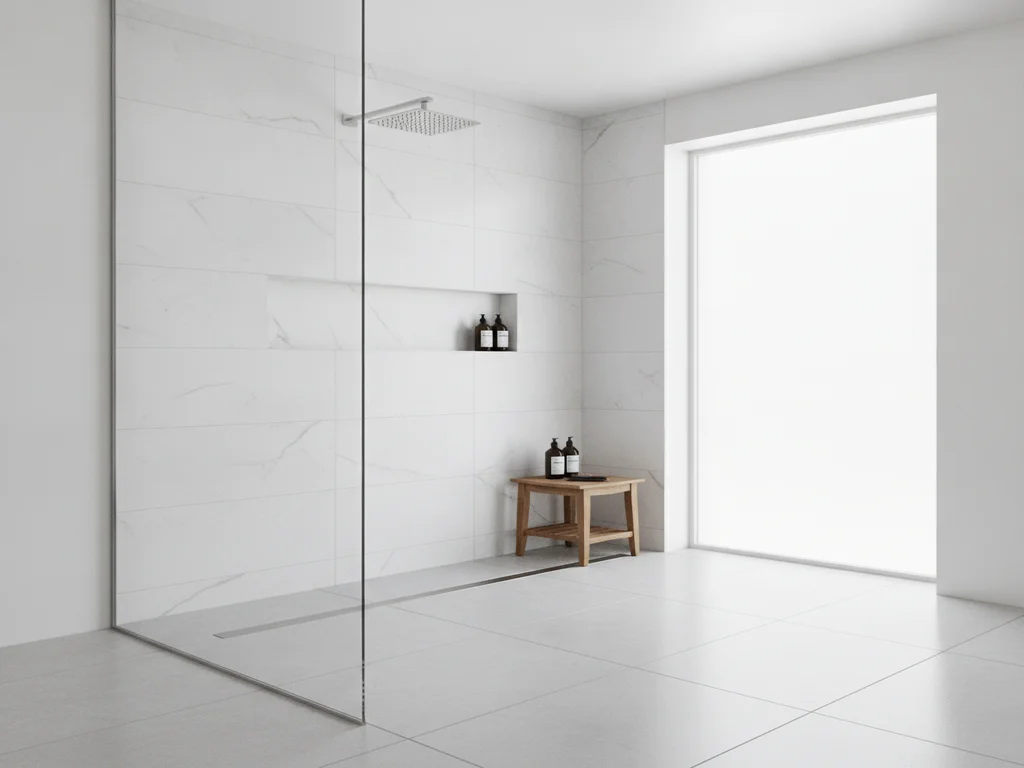
A recessed tile niche keeps shampoo and soap off the floor and off a corner caddy, and it is the other most-requested walk-in shower feature. The framing has to be planned before drywall goes up — a niche is not something that gets added mid-project — and it needs its own waterproofing detail at the recess, since it interrupts the wall's water barrier. A single niche around 12"x24"-30"x14" set at a reachable height, or two smaller niches at different heights for different household members, both work; what matters is deciding the size and position early enough that the framer and waterproofer both know it is coming.
Niche placement relative to the showerhead matters more than most people expect — a niche directly in the spray path stays wetter longer and shows soap scum and hard-water spotting faster than one set slightly out of the direct stream.
Tile: what actually holds up on a shower floor
Wall tile and floor tile are not interchangeable, even when they look similar in the showroom. ANSI A137.1, the ceramic tile standard referenced by the Tile Council of North America (TCNA), sets 0.42 as the minimum wet dynamic coefficient of friction (DCOF) for tile used in level interior spaces expected to be walked on wet — that is the number to ask for by name on any tile going on a shower floor, not just a general "textured" or "matte" description from a sales rep.
Large-format tile on the walls reduces grout lines and reads as cleaner and more current; a smaller-format tile or pebble/mosaic on the floor gives the traction and drainage-friendly seams a large-format tile can't on a sloped surface. The TCNA Handbook for Ceramic, Glass & Stone Tile Installation is the industry reference installers work from for which tile, mortar, and membrane combinations are actually tested and warrantied together — worth asking your installer which handbook method they're building to, rather than assuming any tile-and-thinset combination works in a wet, sloped assembly. For a deeper comparison of tile materials by room zone, see our bathroom tile standards guide.
Drainage: center drain vs. linear drain
A traditional center drain slopes tile in four directions toward a single point, which works well with smaller-format tile that can follow a multi-directional slope without visible warping at the grout lines. A linear (trench) drain slopes the floor in a single direction, which allows larger-format tile to be used on a shower floor — something a center-drain layout generally can't do without the tile visibly bowing toward the drain.
Linear drains also give more layout freedom: they can sit along a back wall, at the shower entry (useful in a curbless design, where a linear drain right at the threshold helps contain water at the transition), or along one side. Either drain type has to tie into a correctly sloped waterproofing assembly underneath — the drain style is a design and layout choice, but the slope and membrane underneath it are not optional, and both are covered in more depth in our shower waterproofing guide.
Glass, tile, and drainage are one decision, not three
A curbless entry with a linear drain and large-format floor tile is a coherent system — each choice supports the others. Mixing a curbless entry with small-format tile and a center drain still works, but it is worth choosing deliberately rather than defaulting into a combination that fights itself.

When accessibility is the goal, not just the look
Everything above describes a standard walk-in shower built for openness and design. If a household needs a shower that genuinely accommodates a wheelchair or walker — now or in a planned future phase — the U.S. Access Board's ADA guidance sets different, more specific targets: a 36"x48" clear interior with a 36"-wide entry for a transfer shower, or a 30"x60" clear interior with a 60"-wide entry for a roll-in shower, plus a fixed or folding seat in most configurations. These are meaningfully larger than NKBA's 36"x36" walk-in recommendation, and they change the room's layout, not just the shower.
The good news is that a well-designed curbless walk-in shower with frameless or half-wall glass is already most of the way to an accessible one — the main gap is usually the interior clearance and seat, not the entry itself. It is worth having that conversation before tile goes down, not after. Our accessible bathroom services page covers what a fully compliant conversion involves.
Putting it together
The strongest walk-in shower designs make the structural decisions first — curb or curbless, drain type and location, waterproofing method — and let glass, bench, niche, and tile follow from there, because each of those choices either supports or fights the ones underneath it. A curbless pan with a linear drain and large-format tile is a coherent system; a curbed shower with a center drain and small mosaic floor tile is a different, equally valid one. What doesn't work well is picking finishes first and asking the layout to accommodate them after the fact.
For what these choices cost installed in a Camas or Vancouver home, see our walk-in shower cost guide. To talk through layout, glass, and tile for a specific bathroom, our walk-in shower services in Camas and walk-in shower services in Vancouver pages cover what a project with us involves.
Ready to plan your Clark County bathroom?
Licensed & insured · 3-year workmanship warranty
Frequently asked questions
- Is a curbless shower worth the extra cost?
- It depends on the household and the subfloor. A curbless entry gives a cleaner sightline and is easier to use for anyone with mobility concerns now or in the future, but it requires more extensive subfloor and waterproofing work than a curbed shower, which is reflected in the cost. See our [walk-in shower cost guide](/guides/walk-in-shower-cost-camas) for real installed ranges by shower type.
- What thickness glass should a frameless shower door be?
- Most frameless enclosures use 3/8" or 1/2" tempered glass. Per National Glass Association guidance, 3/8" glass is generally suitable up to about 84" tall unsupported, and 1/2" glass up to about 120", beyond which a support mullion is typically needed. The correct thickness depends on the actual panel height, width, and whether a corner is unsupported — worth confirming against your specific opening rather than assuming.
- Do I need a linear drain, or is a center drain fine?
- A center drain works well with smaller-format floor tile and is the more common, lower-cost choice. A linear drain is worth the added cost if you want large-format tile on the shower floor (which a center drain's multi-directional slope generally can't accommodate cleanly), or if you want more flexibility in where the drain sits — including at a curbless entry threshold.
- How big should a shower niche be?
- There is no single required size, but a single niche around 12"x24" to 14"x30" set at a reachable height fits most households' bottles and accessories, and two smaller niches at different heights work well for multi-person households. The framing has to be planned before drywall goes up, and the recess needs its own waterproofing detail since it interrupts the wall's water barrier.
- Does a walk-in shower need to meet ADA dimensions?
- No — ADA/Access Board dimensions (36"x48" transfer or 30"x60" roll-in) apply when a project specifically targets accessibility compliance, which most single-family remodels are not required to meet. NKBA's 36"x36" minimum is the general planning guideline for a standard walk-in shower. If aging in place is a goal, it is worth deciding on the larger accessible dimensions before construction starts rather than retrofitting later — see our [accessible bathroom services](/services/accessible-bathrooms/camas) page.
Sources
- NKBA — Bath Planning Guidelines with Access Standards
- U.S. Access Board — ADA Standards, Chapter 6: Bathing Rooms
- Tile Council of North America (TCNA) — Dynamic Coefficient of Friction (DCOF)
- Tile Council of North America (TCNA) — Handbook for Ceramic, Glass & Stone Tile Installation
- National Glass Association — Frameless Shower Enclosures Technical Design Guide
- Glass Magazine — Safe + Beautiful + Frameless (NGA design guidance summary)
Claims and figures are drawn from the sources above and provided for general guidance; your project may vary. Photography is illustrative of design concepts. For a fixed price on your specific bathroom, request a free estimate.